Getting a vehicle ready before upgrading suspension is a process that requires attention to detail and careful planning. The steps taken during preparation affect both the installation experience and the ride quality that follows. Skipping basic checks can lead to preventable issues during or after the install. Taking time before the first bolt is turned can lead to better long-term suspension performance.
Most people use coilover kits to improve handling or adjust ride height. These kits are performance upgrades, and the car must be set up properly before the new parts go in. Preparation helps avoid problems and ensures the new components fit and function as intended. The following steps cover the most effective way to get a vehicle ready for coilover installation.
Check Suspension Condition and Structural Points
Before removing parts, inspect the current suspension for any wear or damage. Look for torn bushings, uneven tire wear, and corrosion around strut mounts or control arms. Use a flashlight to examine hard-to-see areas near the undercarriage and subframe. Rust or cracks near mounting points may affect how new components fit or operate.
Check for fluid leaks from shocks and ensure that all fasteners are intact. Clean the visible parts with a brush or cloth to remove dirt and debris. Remove any broken clips or fasteners and replace them before the installation process begins. This step helps prevent delays and keeps the suspension secure.
Measure Ride Height and Keep Notes
Ride height measurement helps match the new suspension setup with your current stance. Use a tape measure to check from the ground to the fender lip, above the center of each wheel. Repeat for all four corners and record the numbers in a notebook or phone.
Accurate measurements provide a reference point when adjusting coilovers after the install. This also helps detect if the car was uneven before replacement. Record the tire size and air pressure to keep conditions consistent during measurement.
Clean and Prepare Mounting Surfaces
Dust, grease, and rust sometimes build up near suspension mounts. Clean the strut towers, control arm pockets, and lower shock mounts using a wire brush and cleaner. Focus on removing debris from bolt holes and flat surfaces where brackets will sit.
A clean contact surface helps new hardware sit flush without resistance. Use anti-seize lubricant on exposed threads after cleaning to reduce friction during installation. Be careful not to apply too much, as excess can collect dirt or drip onto brake components.
Set Up the Right Tools and Space
Proper tools reduce the chance of errors during installation. Use this checklist to organize everything before starting:
- Floor jack and jack stands
- Torque wrench and socket set
- Breaker bar and ratcheting wrenches
- Spring compressor
- Pry bar and wire brush
Work on a level surface with enough space to walk around the vehicle. Use wheel chocks to keep the car stable. Place removed parts in a tray or marked container to avoid losing any important bolts or brackets.
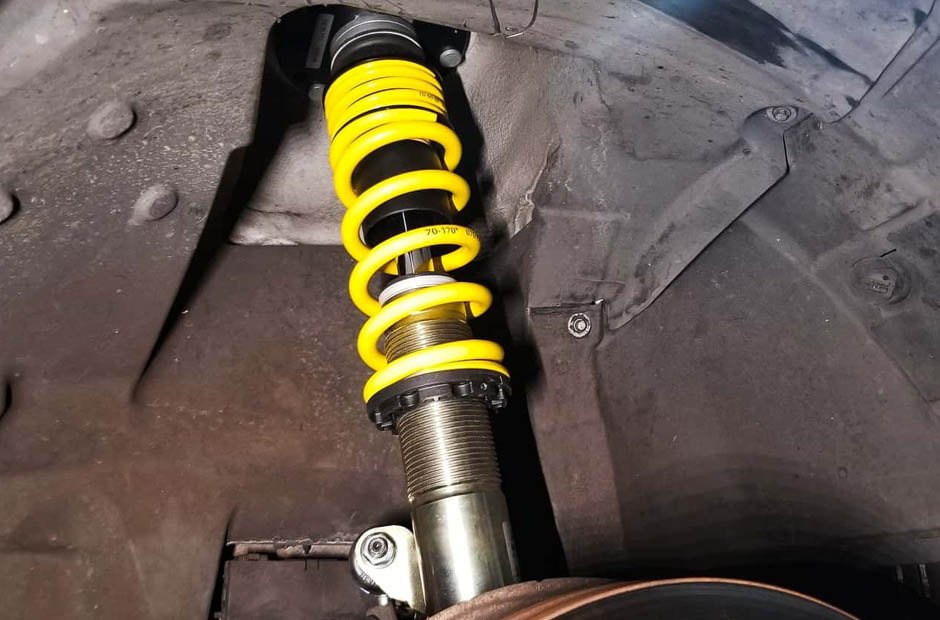
Confirm Coilover Kit Fitment and Parts
Before any parts are installed, inspect the new components for accuracy. Check the coilover body, spring size, and mount shape against your stock suspension. Verify that all nuts, washers, and bolts are included. Lay each part next to the original hardware and review them side by side.
Read the instruction sheet that comes with the kit to confirm torque specs and orientation. If the parts do not match, do not start the install. Matching parts from the beginning reduces the risk of improper fit and rework. Look over the shock length and spring preload settings before placing them on the vehicle.
Book Alignment and Let the Suspension Settle
Coilover kits affect suspension geometry, so realignment is necessary after installation. Schedule a professional alignment as soon as possible to correct camber and toe angles. Driving with incorrect alignment may result in inconsistent handling or steering response.
Before visiting the shop, drive the vehicle for several miles to allow the suspension to settle. This helps avoid premature adjustments and ensures that the alignment reflects the true ride height. Keep the original ride height notes to compare how the setup has changed.
Where To Find Parts That Actually Match Your Setup
Getting the right suspension parts depends on vehicle specs, driving goals, and fitment accuracy. A product-focused site that offers vehicle-specific coilover kits, clear descriptions, and verified compatibility gives buyers a real advantage before starting any install. It removes guesswork and shows exactly what works with each chassis.
The product range on this platform is built around performance, adjustability, and application-based needs. From street use to custom builds, every kit includes detailed specs to guide the selection process. Readers who want proven parts and solid setup guidance can explore the full collection to find what fits, and get straight to the install.